
Easily boost the visibility and accessibility of your courses with the “Featured Courses” block!
Overview #
On your online training platform, it may be helpful to highlight the courses of your choice in a block. This makes them more visible and helps create connections between courses on the same topic.
- Official plugin name: pimenkofeaturedcourses
- Developers : Pimenko Team
- Version: Moodle 4.5 and later
- Download link: https://github.com/DigiDago/moodle-block_pimenkofeaturedcourses
 What sets this plugin apart from other existing Moodle plugins! #
This “block” plugin allows you to add a new block titled “Featured Courses” to your Moodle site.
With this block, you can:
- Highlight courses in blocks that you select;
- Choose the order in which the selected courses are displayed;
- Add blocks to different parts of the site (the site’s home page, the dashboard, within courses, etc.);
- Display additional information related to the selected courses (enrolled students’ names, custom fields, description, tags).
Key Features at a Glance #

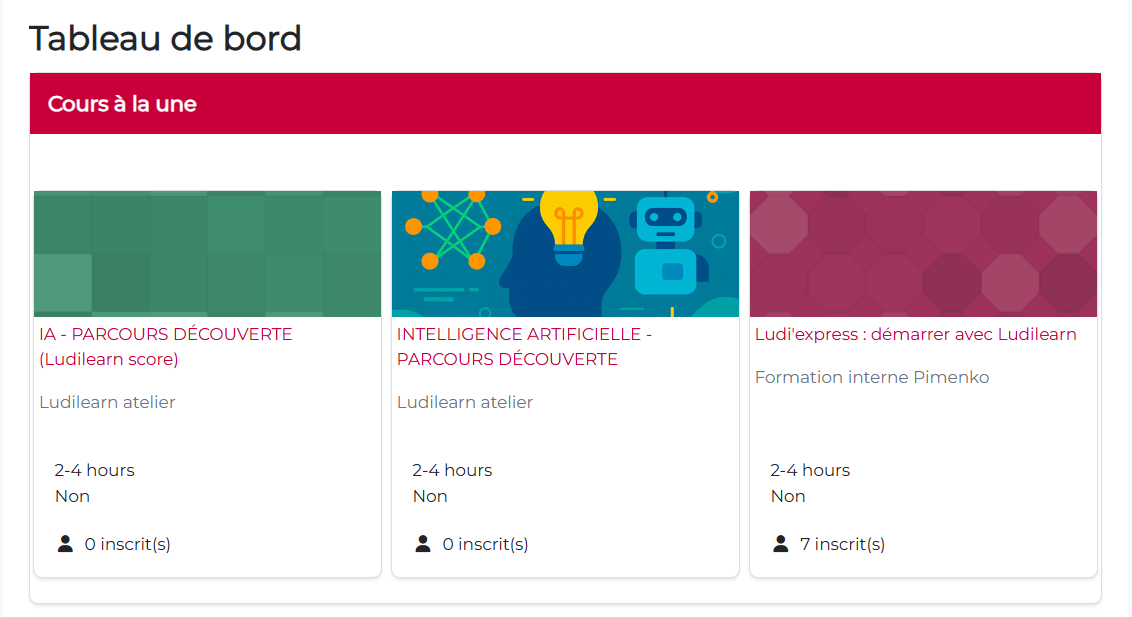
The “Featured Courses” block displays:
- The image for the courses you have selected (if there is no image, a pattern is generated automatically);
- Course titles and their categories;
- Custom fields for courses;
- Tags associated with the courses;
- The number of participants in the course (optional);
- Click on the title or image to access the course;
- A button that displays the course description (if available).
Step-by-step instructions for using the block #
Once the plugin is installed on the site, the “Featured Courses” block appears in the list of available blocks on the home page, the dashboard, and within courses.
Step 1. Activate edit mode.
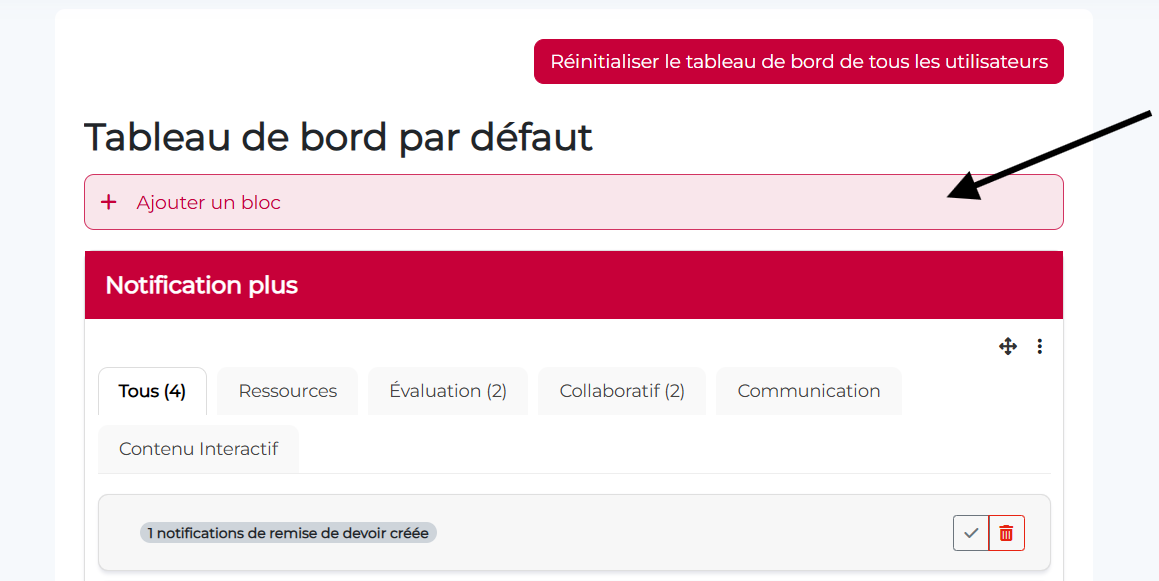
Step 2. Click “ Add a block ” on the page or from the blocks drawer on the right.
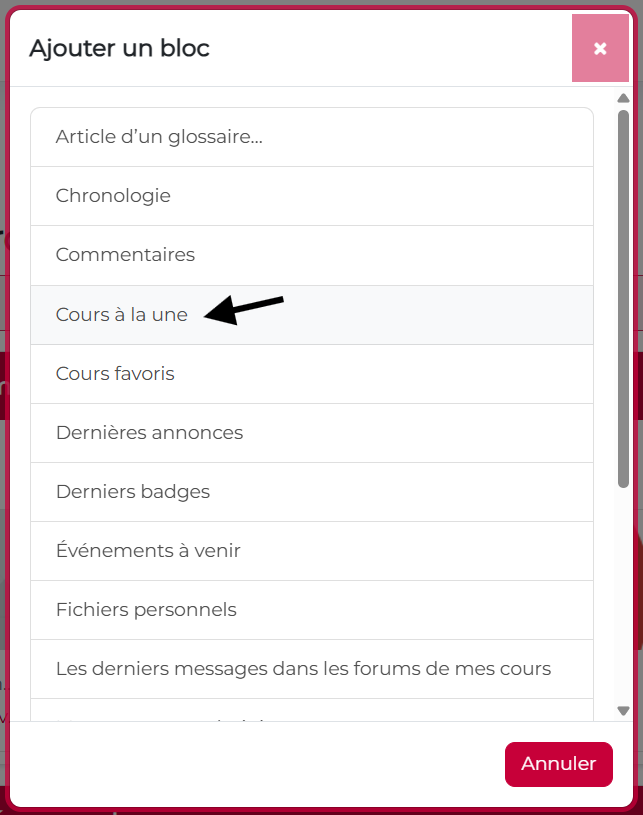
Step 3. Select the ” Featured Courses ” block from the block selector.
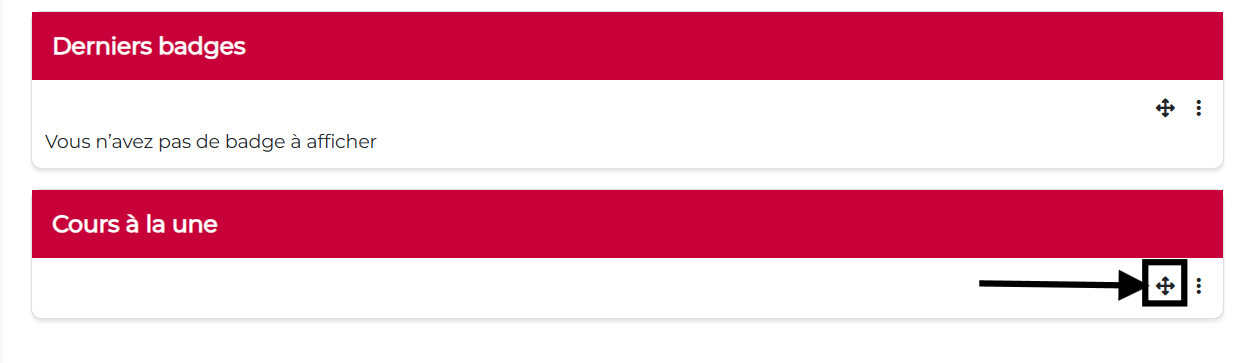
Step 4. If the block does not appear in the desired location, you can move it as you like using the “drag and drop” button.
Note: If you haven’t selected any courses in the block settings, the block will be hidden from users. You should therefore proceed with the following steps.
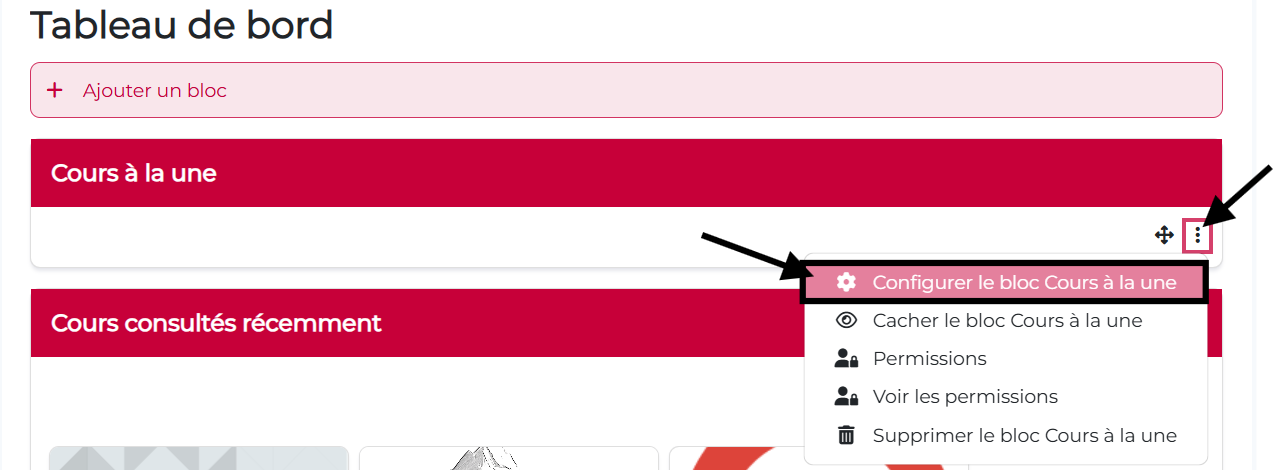
Step 5. Click thegear icon, then click “Configure the Featured Courses block.”
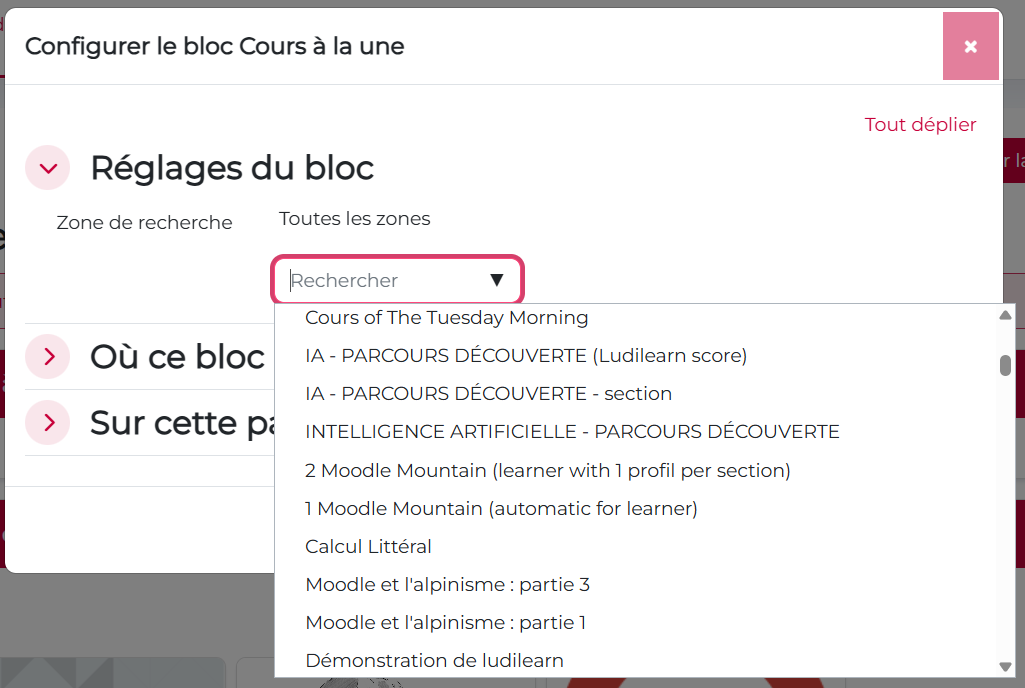
Step 6. Use the search bar to select the courses you want to highlight.
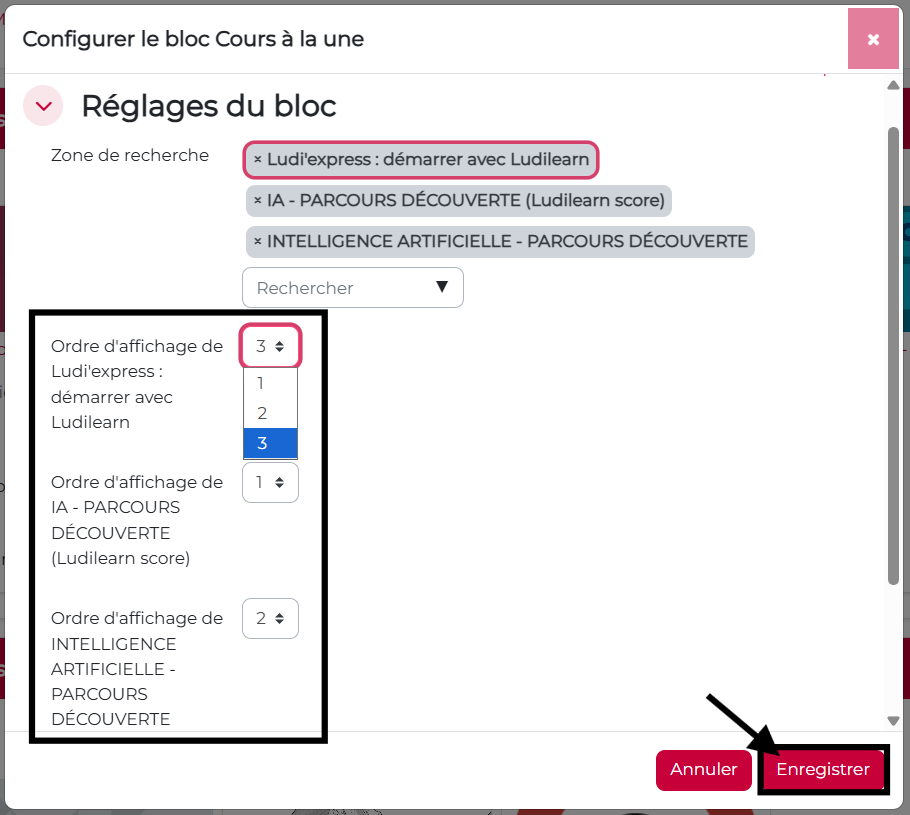
Step 8. Click ” Save.”
Featured courses are now highlighted and easily accessible on the site’s home page or on the user dashboard. Within a course, you can use this block to create links between this course and other courses on the same topic.
Option to hide the number of students enrolled in the course #
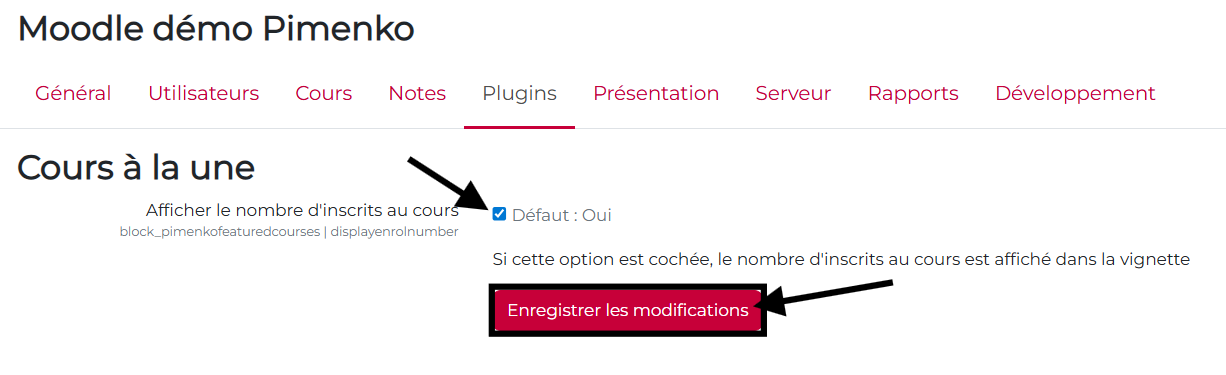
By default, the block displays the number of students enrolled in the course. You can hide this information in the site’s admin panel.
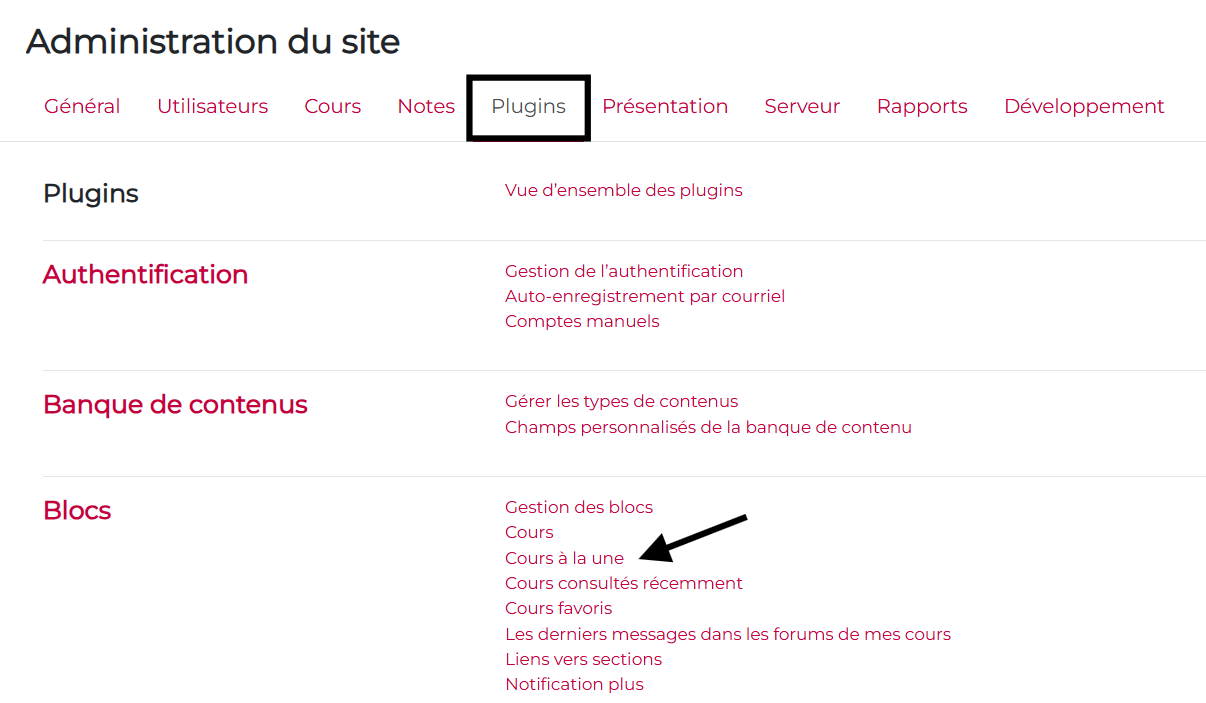
Step 1. Click “Site Administration,” then select the “Plugins” tab . You’ll find a link labeled ” Featured Courses.”
Site Administration > Plugins > Blocks > Featured Courses
Conclusion #
” Featured Courses ” lets you highlight a selection of courses anywhere on the platform. Each block is independent and has a customizable display.


