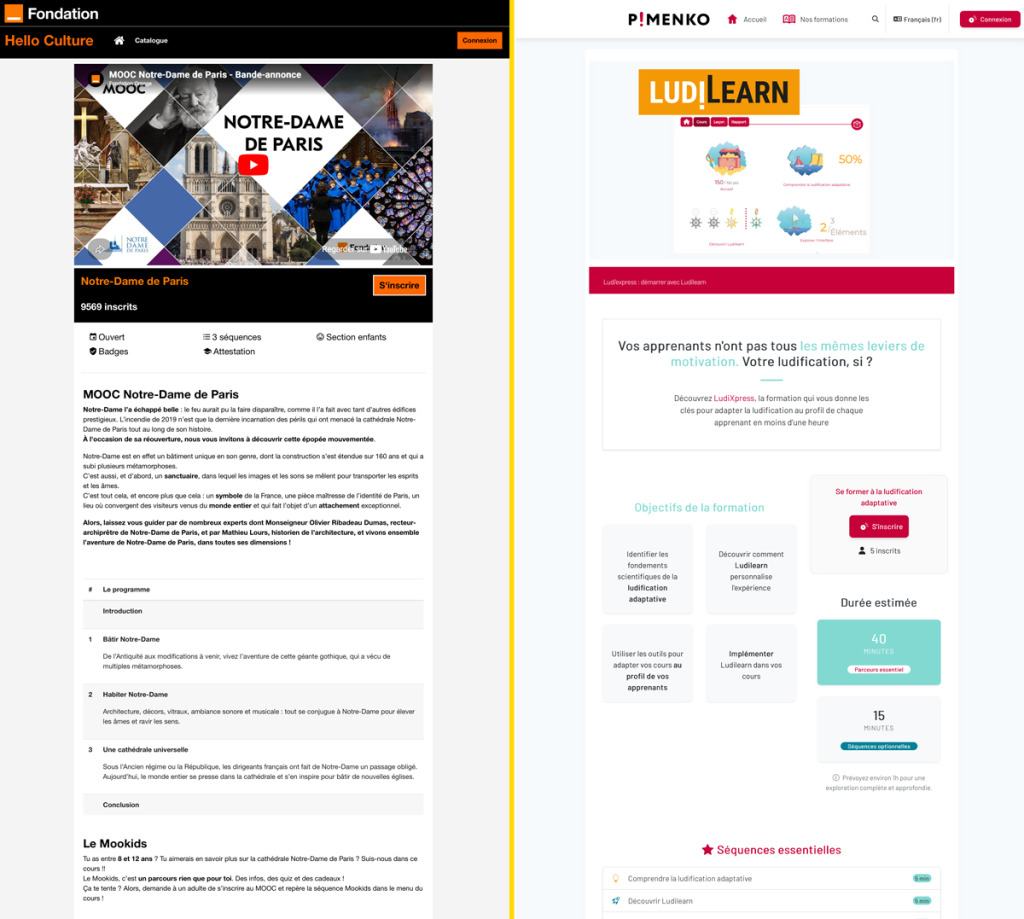
With Moodle’s standard self-enrollment process, a learner who discovers your course sees a minimalist page: a title, sometimes a password field, and an “Enroll” button. Little context, no information, no reason to get involved.
Enroll Synopsis offers an alternative with an attractive and comprehensive presentation of your course: customizable, visual, and featuring automated information—all without leaving Moodle and without requiring any special development.
Overview #
Enroll Synopsis is a registration method plugin for Moodle developed by Pimenko. It offers an alternative to Moodle’s native self-enrollment page with a fully customizable landing page. Depending on the template you choose, this page can include custom content areas (text, images, videos) and fields that appear automatically (course section titles, instructors, tags, number of enrolled students).
In short, with Enroll Synopsis, you can:
- Create a course overview page that learners can view before enrolling.
- Choose between two layout templates depending on the type of customization you want.
- Automatically display course information: section titles, instructors, tags, number of enrolled students, and custom fields.
- Offer a pre-registration period: learners register before the course officially begins.
- Control access using a registration key, opening dates, a maximum number of registrants, or a cohort.
Plugin Information #
- Official name: enrol_synopsis
- Type: Registration Method
- Compatibility: Moodle 4.1 and later versions
- Maintenance: Pimenko
What Sets Enroll Synopsis Apart from Traditional Self-Enrollment #
Moodle natively supports a self-enrollment method. It works well from a technical standpoint, but the page that a non-registered learner sees is limited to the bare minimum: a course title, a possible login field, and a button. No visual elements, no descriptions, no context.
Enroll Synopsis offers a presentation page that you can customize as you like:
- Visual hook in native self-registration: a banner area for a teaser image or video
- Flexible and comprehensive content description: open-ended sections to present the program, objectives, and prerequisites
- Information about instructors: automatic display of instructors with photos and descriptions
- Pre-registration period: learners can register before the course begins
All the usual settings for Moodle self-enrollment (key, dates, cohort, maximum number of enrolled students, etc.) remain available and function in the same way.
Key features at a glance #
Two layout templates #
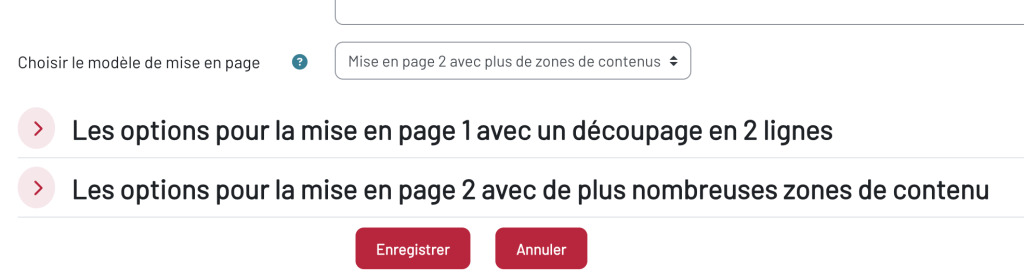
Enroll Synopsis offers two models. Choose the one that best suits your needs.
Template 1: Simple Layout
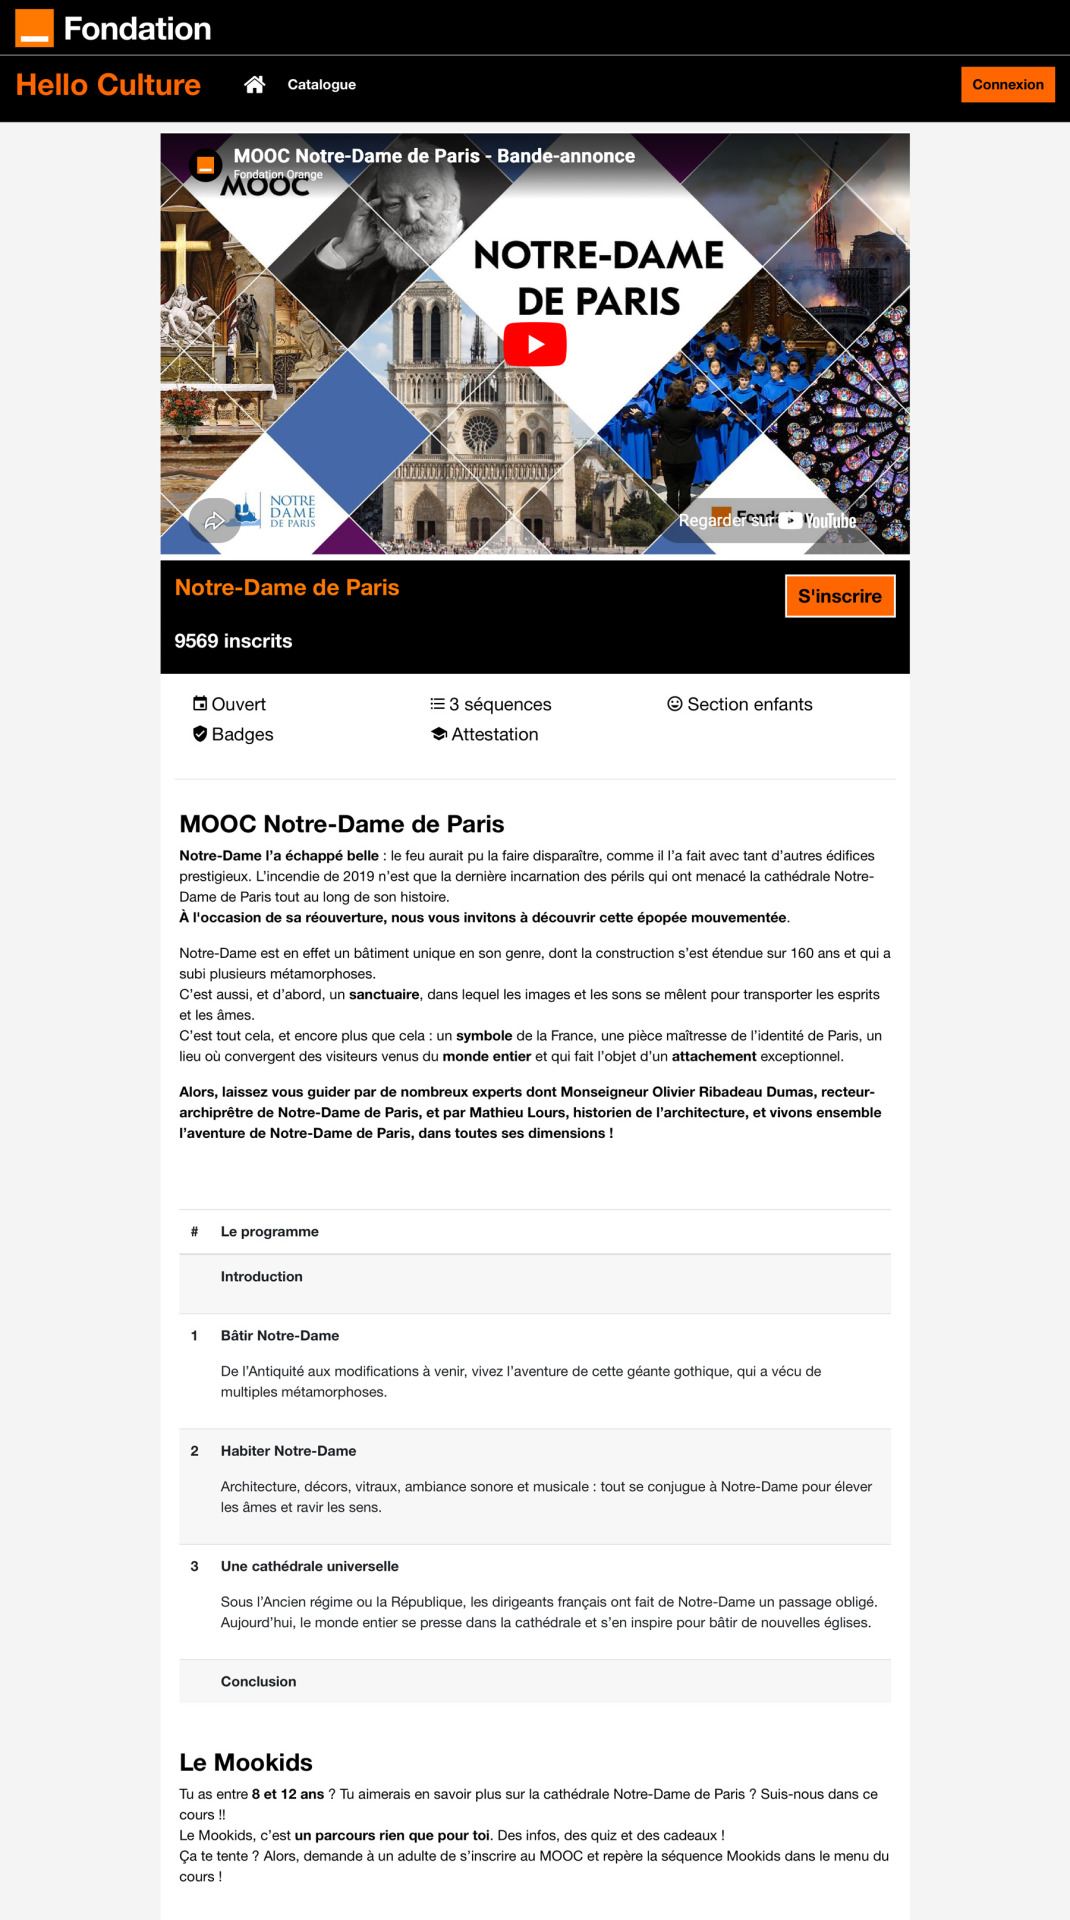
Two large open areas: one at the top (ideal for a promotional video or a banner image) and one at the bottom (for text: program, prerequisites, description, etc.). The course title, subtitle, number of enrolled students, and the “Enroll” button are automatically displayed between the two fields.
This template is a good choice if you want a clean layout or if you know HTML well enough to create a more elaborate design.
Template 2: Advanced Layout
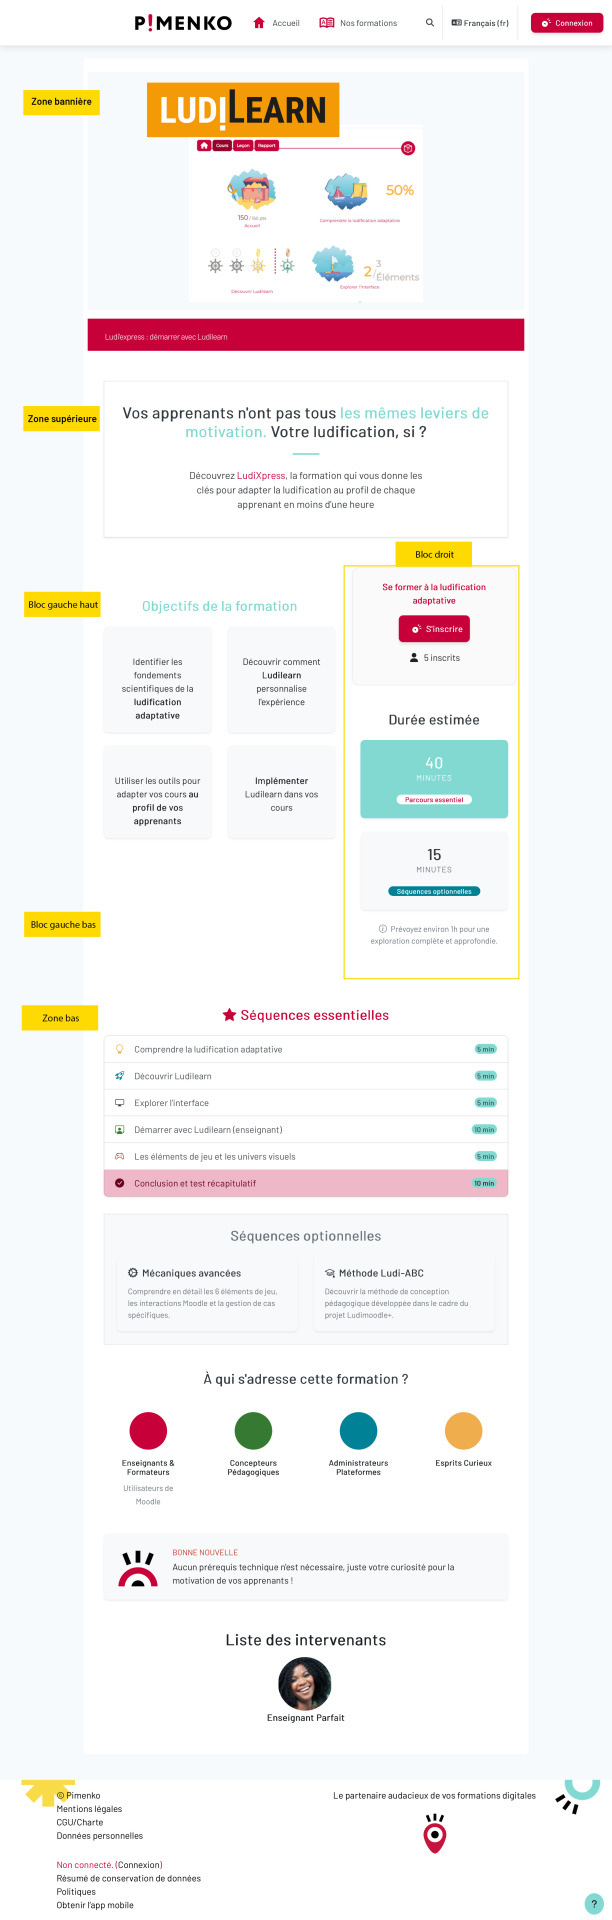
Several text fields scattered throughout the page, supplemented by fields that appear automatically. This model is more structured and does not require any technical knowledge.
Automatic Fields in Template 2
Model 2 automatically displays the following information without requiring any manual entry:
- Course title and custom fields in the banner area at the top of the page
- Course outline (section titles) in the left pane, if the option is enabled
- Course subtitle, “Register” button, number of registered students, and tags in the right-hand column
- List of contributors (photo, name, description) at the bottom of the page, if this option is enabled
Pre-registration period #
By using the registration start dates, you can allow learners to register for the course before it officially opens. They go to the course overview page, view the content, and enroll, but they don’t start the course until the start date.
This use case is particularly common in MOOCs and fixed-date courses.
Step-by-Step Guide to Using Enroll Synopsis #
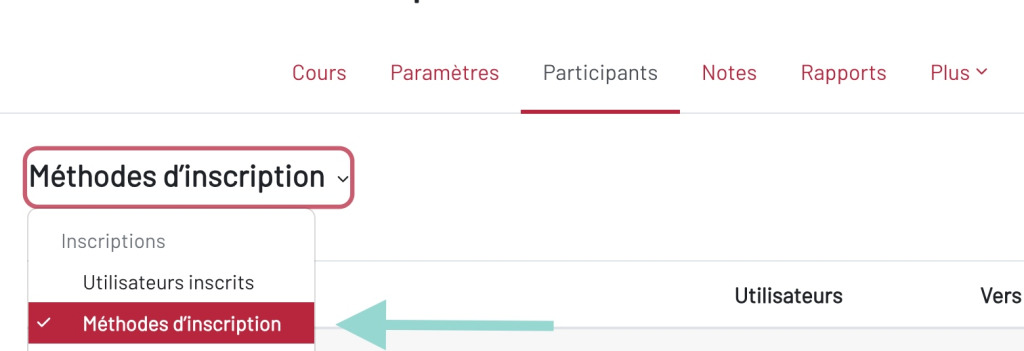
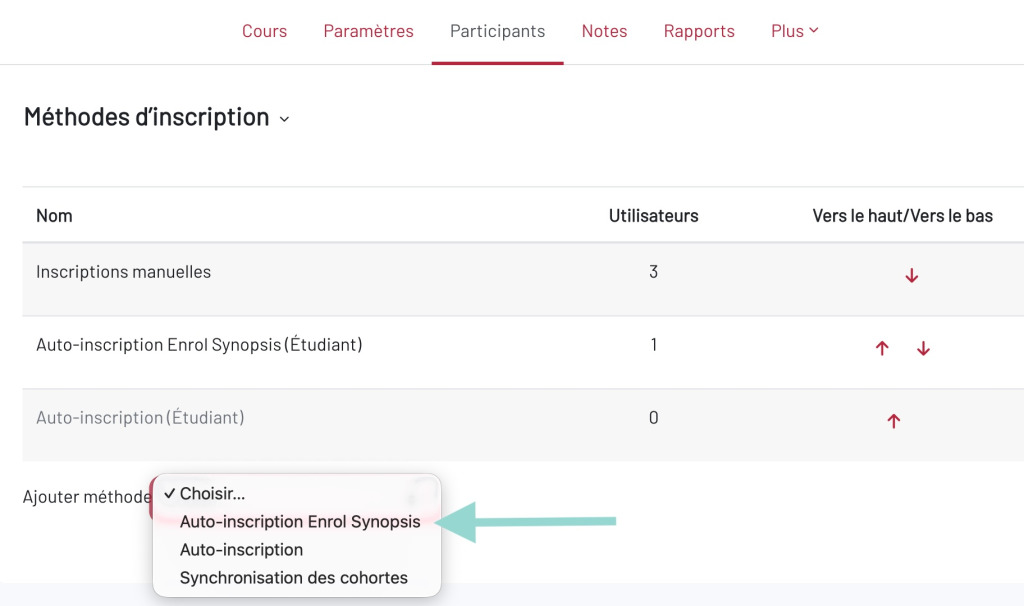
Add the registration method #
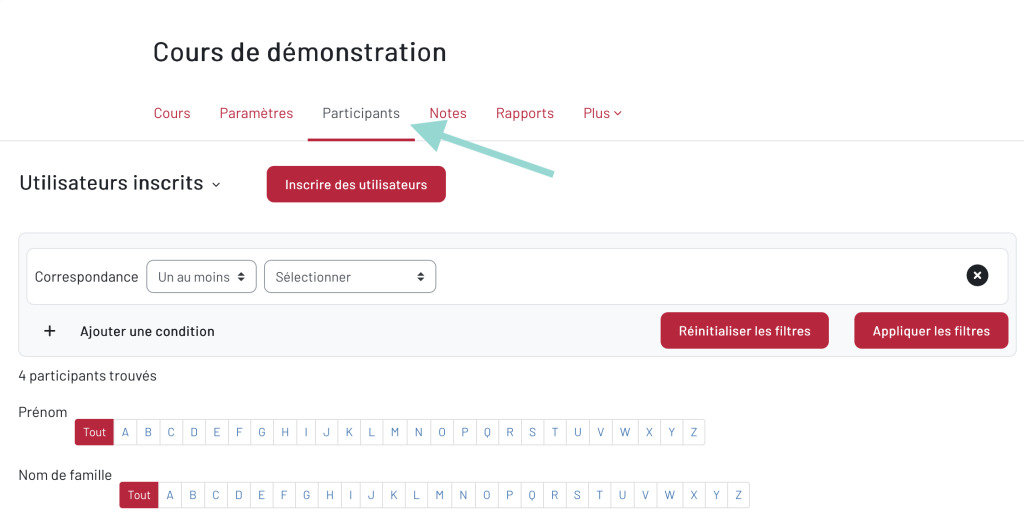
Step 2: Click the “Registered Users” drop-down menu, then select “Registration Methods”
Select a layout template #
At the bottom of the settings page, select the desired template from the “Choose Layout Template” drop-down menu, then click “Save.”
Configure Template 1 #
Model 1 displays two empty areas, one above and one below the automatic class information.
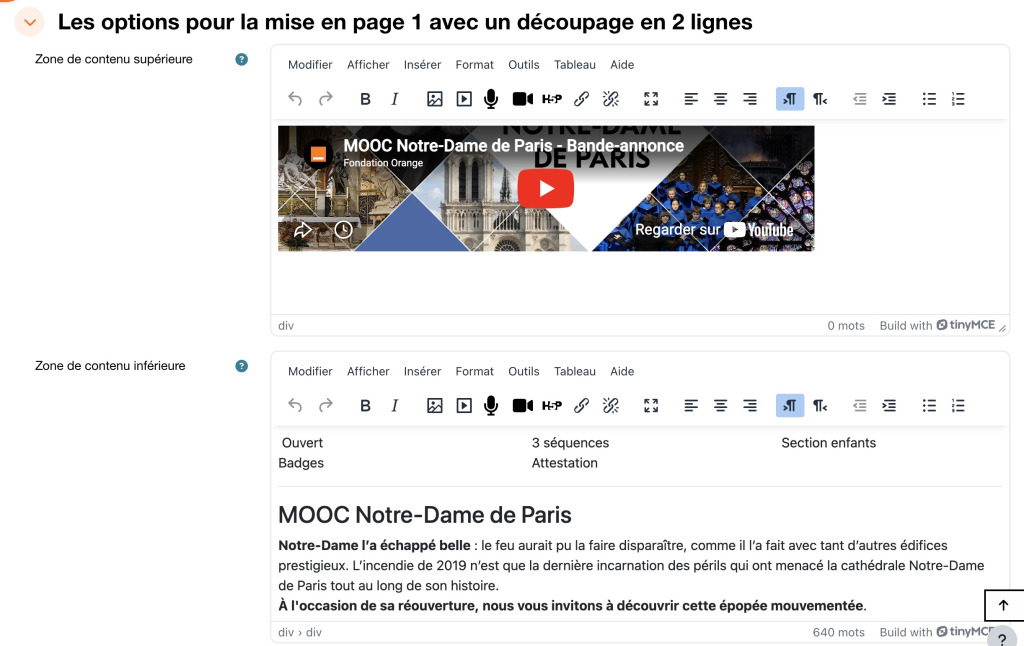
Top content area: It appears at the top of the page, before the course title. Recommended for a teaser video or cover image.
Example of the registration page output using Template 1:
Configure Template 2 #
Template 2 features several blank areas spread across the page, organized into blocks. Each field can be left blank; only the fields that have been filled in are displayed.
Zone
Position
Sample Content
1. Banner Area
Top, full width
Cover image or video. The title and custom fields appear automatically below it.
Possible auto-fill field: course title
2. Upper section
Full width
Short tagline, introductory text
3. Top-left block
Left column (60%)
Objectives, Prerequisites. The course outline will appear here if this option is enabled.
Possible auto-fill field: the course outline (section titles) if the “Show course outline” option is enabled
4. Lower-left block
Practical Information: Duration, Details, Target Audience
Left column (60%)
5. Right Block
Right column (40%)
Additional content. The subtitle, the “Sign Up” button, the number of registered users, and the tags are automatically displayed at the top of this block.
Possible automatic fields: course subtitle, “Enroll” button, number of enrolled students, course tags
6. Footer Area
Bottom, full width
Acknowledgments, Partners, Certifications. The list of speakers appears automatically below.
Autofill field (optional ): The list of participants appears below this field if this option is enabled
Options specific to Model 2:
Show Course Outline: Automatically displays the course section titles in the left pane. Allows learners to view the program before enrolling.
Once the plugin is installed on the site, the “Learning Time” tab appears in the list of available reports for each course.
Registration Settings #
Enroll Synopsis incorporates all the settings from Moodle’s standard self-enrollment feature. Here is their description.
 Allow new registrations #
If this option is set to “No,” new registrations are blocked, but learners who are already registered retain their access (if “Maintain access for existing registrants” is enabled). The “Sign Up” button is replaced by the message: “Sign-up is disabled or inactive. “
Maintain access for existing subscribers #
If this option is set to “No,” all existing enrollments made using this method are suspended, and the course becomes inaccessible to those learners. If it is set to ” Yes ” and “Allow new enrollments” is set to “No,” only learners who are already enrolled can access the course.
Registration Key #
Protect access to the course with a password. Learners will need to enter it only once when they register. An input field appears automatically above the “Sign Up” button. Leave this field blank for free access.
Default role #
Defines the role automatically assigned to the learner upon registration. In the vast majority of cases, leave it as ” Student.”
Registration Period / Start Date / End Date #
These options allow you to limit the time period during which learners can access the course:
- If the end date has passed, the following message appears: “You can no longer register, as registration ended on [date].”
- If the start date has not yet arrived: “You cannot register yet; registration begins on [date].”
Notify Before Expiration / Notification Threshold #
Send an automatic reminder before the registration deadline. Select who receives it (teacher only, or teacher and student) and the timeframe in days. Example: A registration period ending on December 24 with a 2-day threshold: the notification is sent on December 22.
Removing Inactive Users After #
Automatically unenrolls learners who have not accessed the course for the specified number of days. Select “Never” to turn this option off.
Maximum number of registrants #
Limit the number of students who can register. Enter 0 for unlimited access. When the limit is reached, the following message appears: “The maximum number of users allowed to register has already been reached.”
Restrict to a cohort #
Limit new registrations to members of a specific cohort. Existing registrations are not affected. A learner who is not part of the cohort will see: “You are not eligible to enroll.”
Welcome Message #
Send an automatic email to each learner upon registration. Select the sender (course contact, administrator, no-reply address) and customize the message content. We recommend using a ” no-reply ” email address to avoid deliverability issues.
Conclusion #
Enroll Synopsis is installed and configured directly within the enrollment procedures for a Moodle course. Once it’s activated, your self-registration page will look different—just choose a template and fill in the fields.
It is intended for anyone who wants to make a good first impression with their class:
- For trainers and teachers: Use Template 2 to create a well-organized page that presents the program, objectives, instructors, and background of the training—all without requiring any technical skills—to encourage your learners to sign up.
- For training organizations and institutions: standardize the presentation of your courses, enhance your content with visuals, and open registration early through the pre-registration period.
If you have any questions about installing or configuring the plugin, the Pimenko team is here to help.


